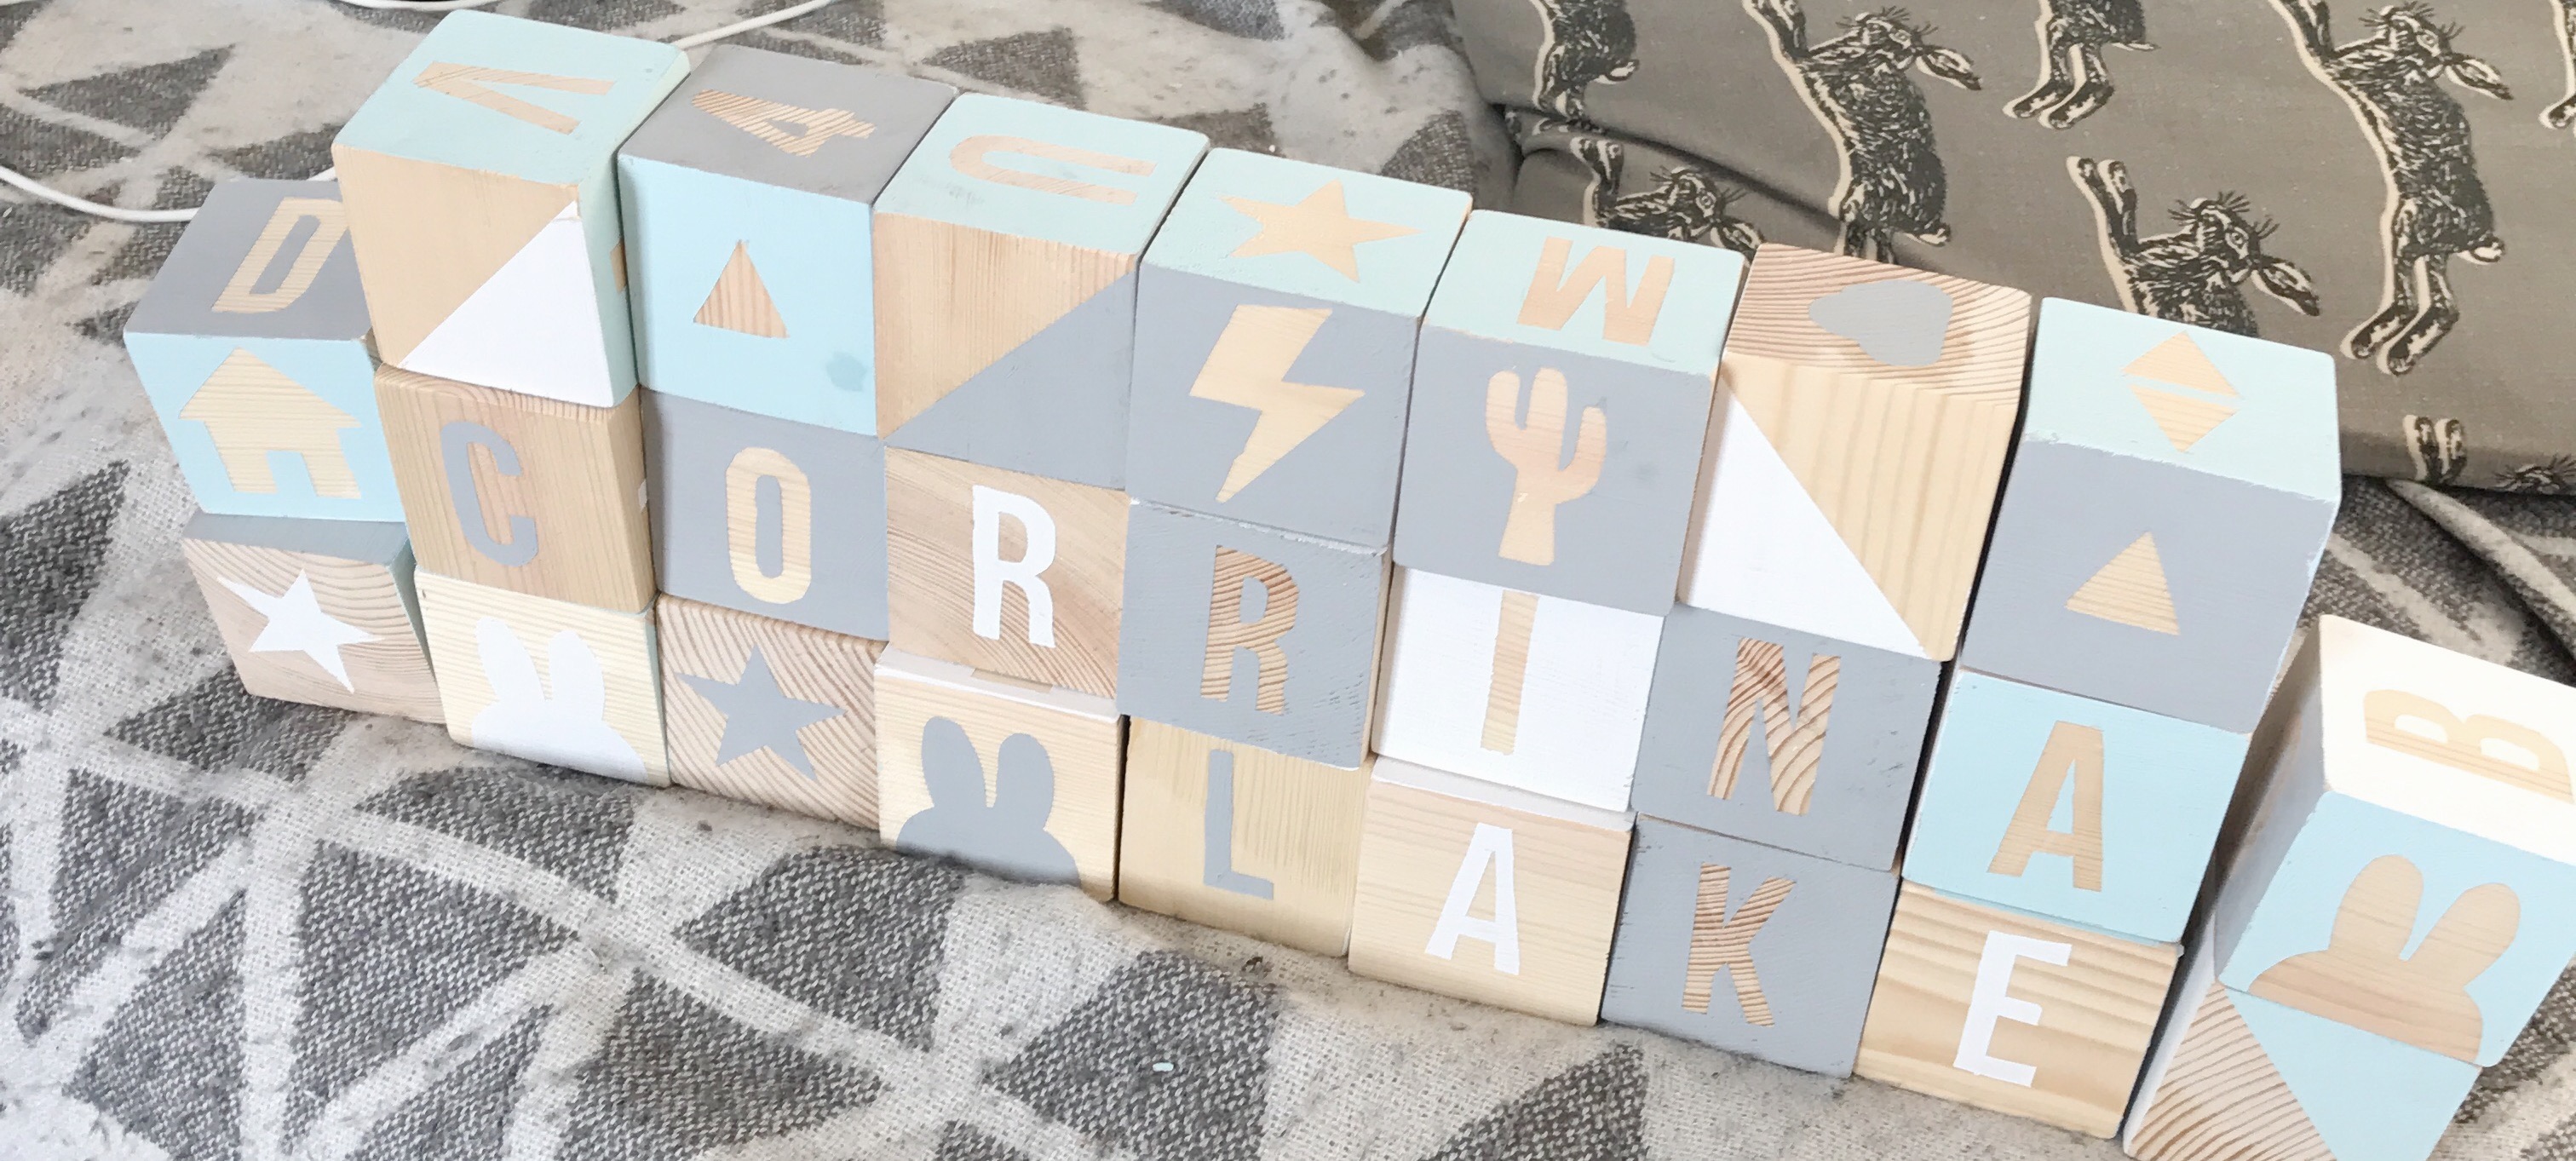
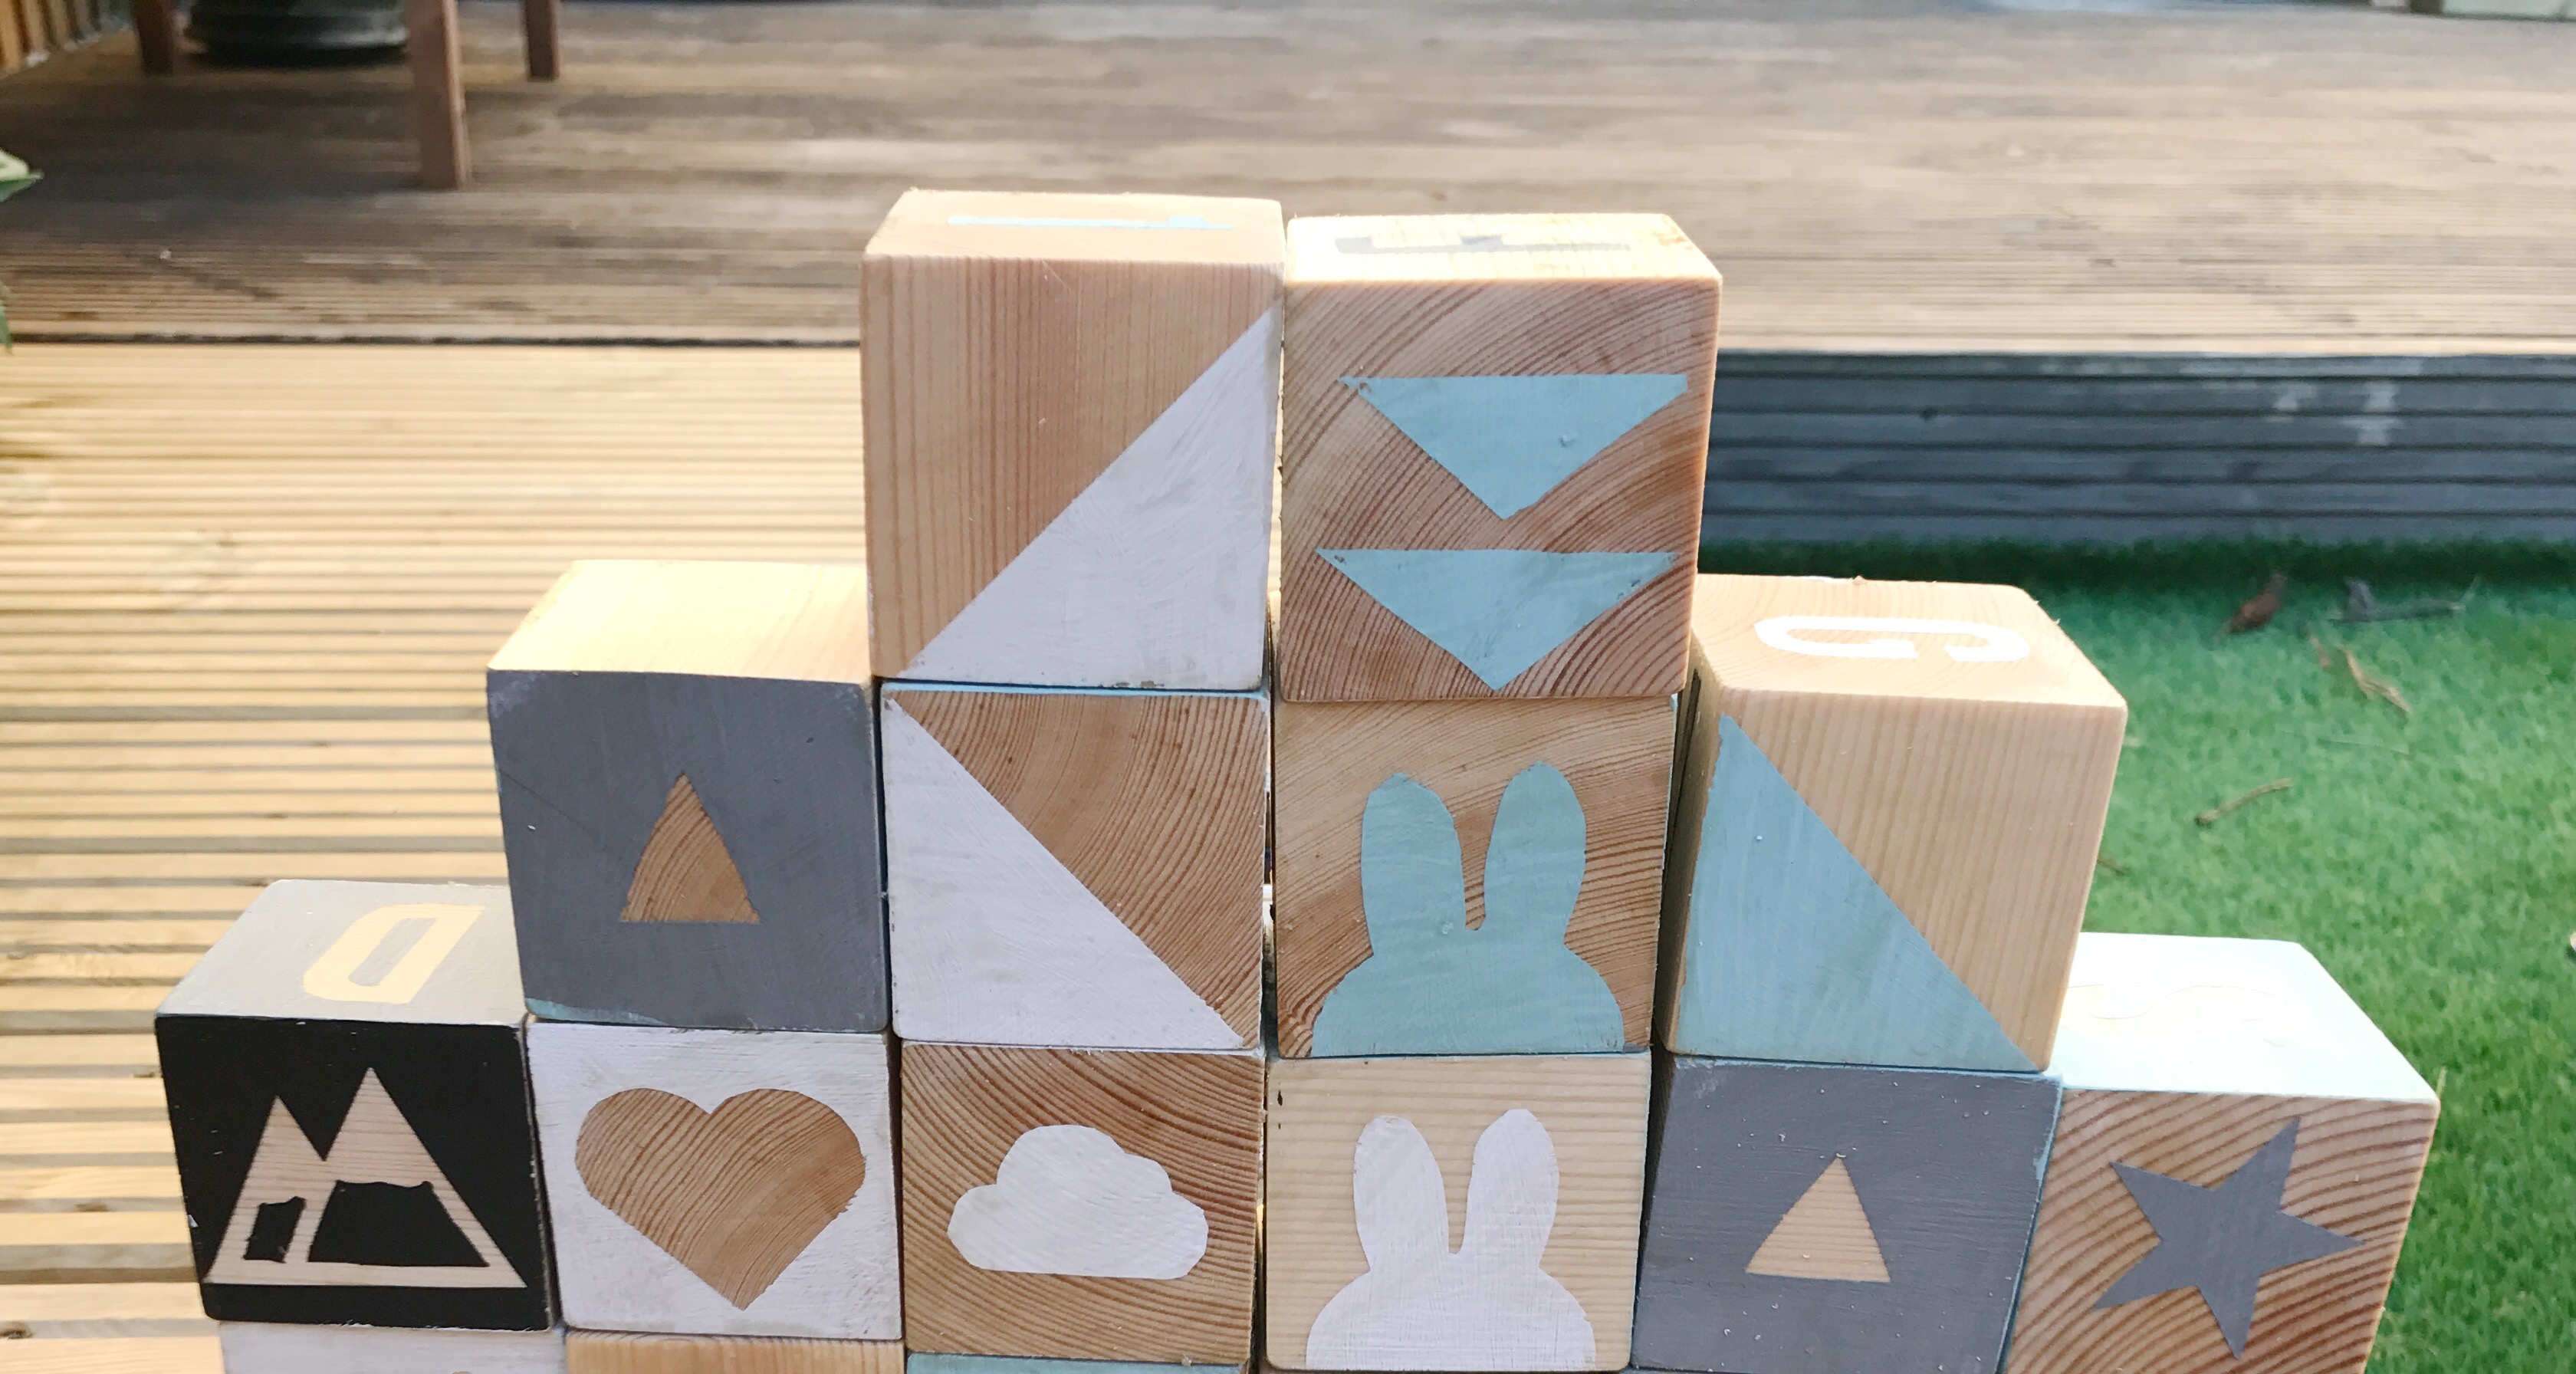
Whilst Corrina is still too little to play with toys, I’ve been building up a toy box of handmade toys for her and here’s how I made her building blocks. This was one of those projects that I thought would be quick, but it does take a while. However, doing it this way means you get way more bricks than you do from other companies, and you can decide what to put on them. Just settle down with a good box set or in the sunshine, because it takes a good few hours!
I started by creating a Pinterest board full of blocks to get some ideas of what to put on them. You can find my board here
What you need
Blocks. You could just cut them yourself, or I got mine from eBay from Metacon Ltd for £14.99

Sticky Back Plastic (buy it in A4 sheets with the matt backing paper)
Paint. I bought the Dulux sample pots in Mint Macaroon, Rock Salt, Natural Slate and Black
How to do it
If you buy sticky back plastic already in A4 sizes, you can put them in a home printer and print the templates on the back. For the letters I used the font Bebas Neue, and for the shapes I just googled images of bunnies, stars, arrows etc. Sometimes you get a better image if you type “Star icon”. For the letters, you will need to make more of the more common letters.
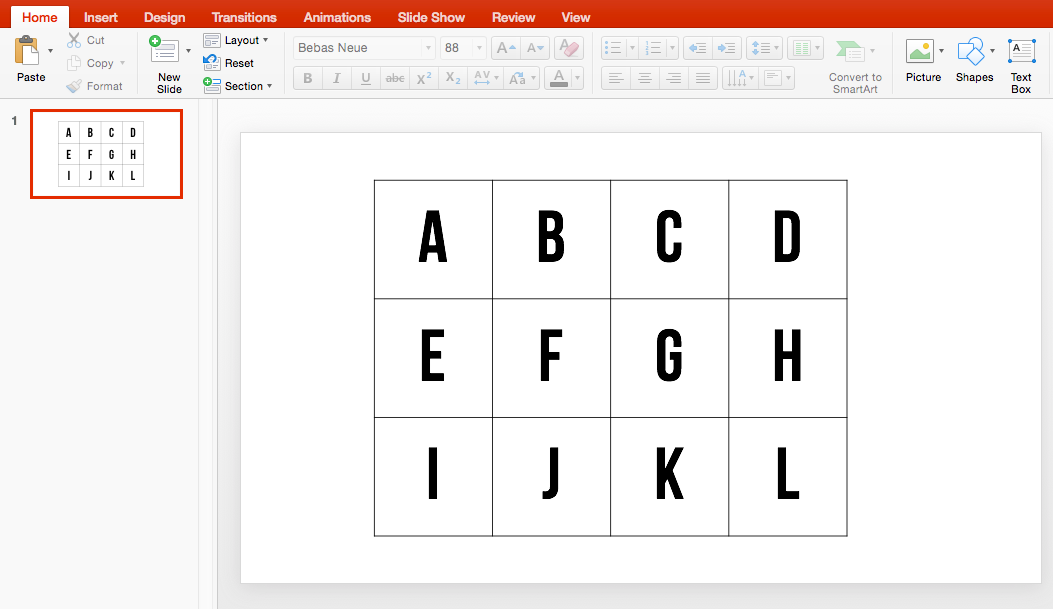
In Powerpoint I set up a grid with the 50mmx50mm squares and populated the grid with the images, letters and numbers I wanted. For 25 cubes you will need to fill 150 squares.
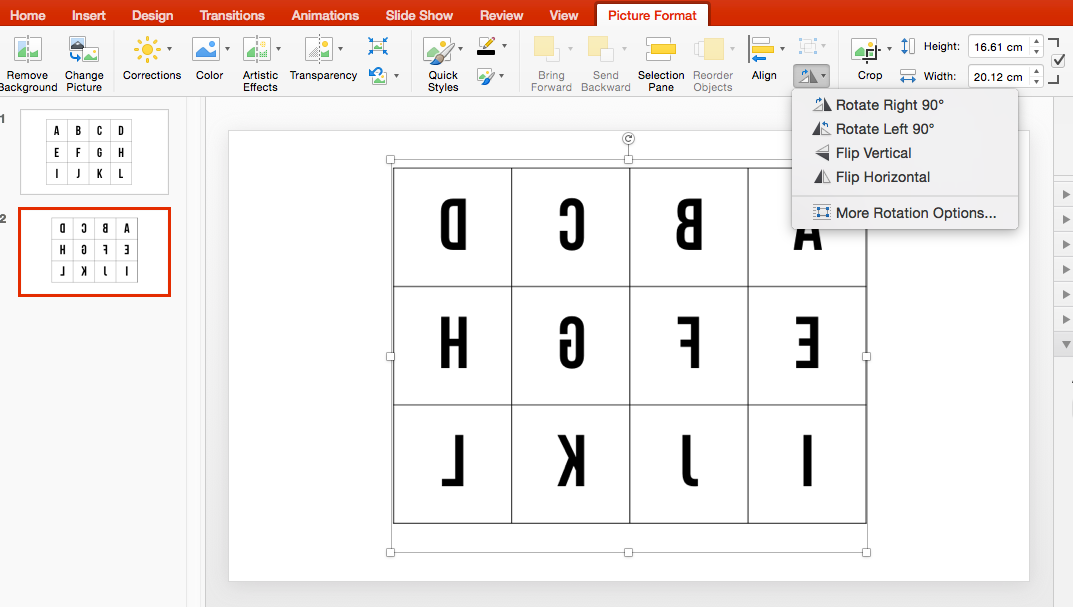
For the letters you will need to fill in the grid with the letters you want, then save the whole thing as an image and then flip it: you need the letters back to front as you’re making a template. They’ll be the right way round on the building block! (To do this, highlight the whole table, copy it, right click and “Paste Special” as a picture. Then use the Picture Format menu to “flip horizontal”.)
Print your sticky back plastic sheets so the printer prints onto the paper backing. (Make sure your printer is printing at 100%, as the grid is the same size as the blocks, so they need to match!) Once printed, start cutting them out. There are two ways you can cut out: you can either make a template (e.g. cut the letter out and leave the square of sticky back plastic around it) or you can cut the letter, stick it on the block and paint over it. I used scissors, but I imagine using a craft knife and cutting mat would give a better finish.
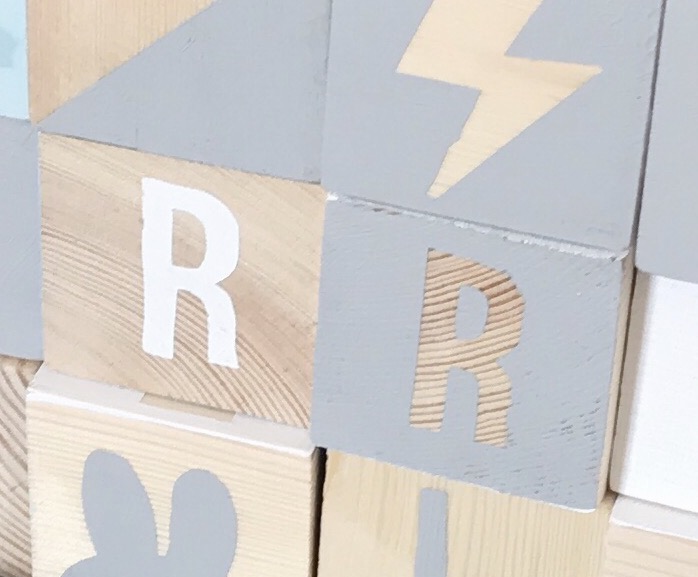
The “R” on the left is the template, and on the right is sticking the letter on and painting over it
Stick all your letters, numbers and shapes on, and then paint the blocks. Don’t wait for the paint to dry too much before you peel off the sticky back plastic, as it sometimes takes the paint with it!
I also varnished mine with a clear polyurethane varnish, but honestly I wouldn’t bother if I did it again: it was a sticky mess and it’s actually left a bit of tinge on the paint!
Whole project comes to about £23, which is a lot cheaper than the “10 blocks for £35” you see online and on Instagram! You can pick your colours and images and you get 25 blocks, but it is pretty time consuming!

Need money? The financial robot is your solution.
Link – https://tinyurl.com/y7t5j7yc
Need some more money? Robot will earn them really fast.
Link – https://tinyurl.com/y7t5j7yc
Financial independence is what this robot guarantees.
Link – https://tinyurl.com/y7t5j7yc
No need to work anymore while you have the Robot launched!
Link – https://tinyurl.com/y7t5j7yc
Start making thousands of dollars every week just using this robot.
Link – – https://tinyurl.com/y7t5j7yc
Make money online, staying at home this cold winter.
Link – https://plbtc.page.link/zXbp
Launch the financial Robot and do your business.
Link – https://tinyurl.com/y7t5j7yc
Have no money? Earn it online.
Link – https://tinyurl.com/y7t5j7yc
Make thousands of bucks. Pay nothing.
Link – https://tinyurl.com/y7t5j7yc
Need money? The financial robot is your solution.
Link – https://tinyurl.com/y7t5j7yc
Trust the financial Bot to become rich.
Link – https://tinyurl.com/y7t5j7yc